Sunday, December 26, 2010

What can I possibly do for my garden in December?


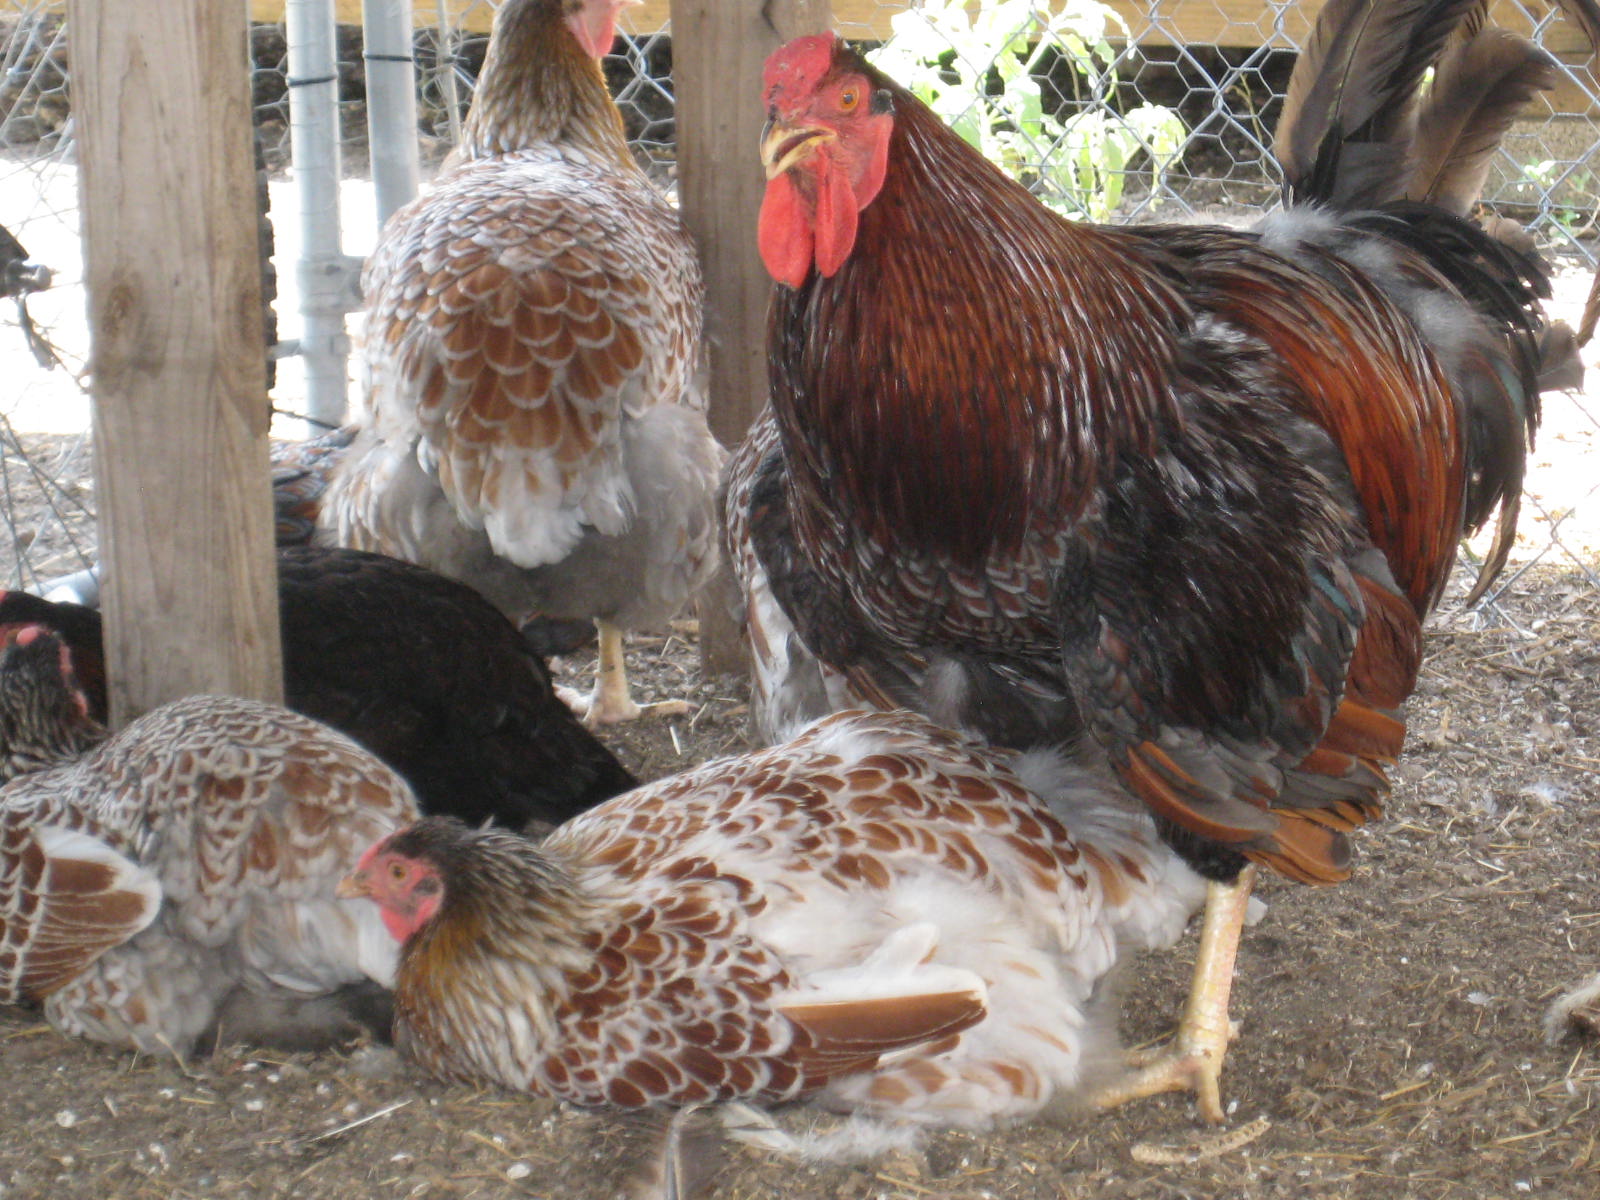
chickens can eat dead weeds and scratch the soil

O.K. gardeners this should of been done last month but its still not too late to bring inside tender plants to a frost free greenhouse, covered porch or patio, or basically anywhere where the plants can continue to get light, but avoid the frost and harshest of the cold weather. Stronger winter resistant plants should be covered with a nice layer of mulch to protect them. A good layer of bark-chips or straw will suffice for perennials that have died down, however, for larger plants; they will need some type of covering. I am also listing 8 other suggestions that I myself practice every winter.

  1. This is an excellent time to tend to other landscaping items. Give garden paths a good cleaning, especially making sure you give a lot of attention to once shaded areas where leaves need to be raked up. Take a look at your sheds and fences. Do they need any repairs? If not, maybe a coating of stain or paint could be applied.

  1. Protect your water pipes by wrapping them up in old rags, towels etc. anything to protect them from the coldest temperatures. You can also wrap up the faucet tightly with a thick cloth when it is not in use.

  1. Be sure to feed the birds. Wild birds that visit your garden really need your help now and over the next few months. Their natural food supplies are at their lowest and water sources can freeze. Do not allow birdbaths to freeze over. If they do freeze, crack the surface to let the birds get to the water below, or even better give them fresh water daily.

  1. If you have plants under mulch don't forget to water them. However, do so sparingly as plants require less water at this time of year while they are dormant. Over-watering can lead to rotting of the plant.

  1. Winter's a great time to let the chickens into the empty flower beds and garden plots so they can incorporate organic matter into the soil as you dig to improve the quality of the soil. Avoid digging in very wet weather when the soil is saturated.

  1. Now that all the fruit has been harvested from your fruit trees and bushes, take the time to spruce them up with any required pruning. Make sure to prune all shrubbery and vines such as grapes and berries now.

  1. Now’s the time to buy seeds and get great bargains. Most seed companies make their new stock available in late November or December. Take the time now to browse through their catalogues or visit gardening websites and buy the seeds you want to plant in the spring.

  1. Last but not least take a break. You've had a busy year, put your feet up on a footrest with a hot cup of green tea and watch an old rerun on television. You deserve a rest! And look forward to starting all over again in January.

Monday, December 20, 2010

Preventing feather loss

Feather loss is a natural process with all birds. It is also an indicator that there may be problems in the management of your flock. This could be due to nutrition, the environment, social issues or for many other reasons. Most feather loss remedies require changes to the  management of your birds. Feather loss results in increased food consumption and less egg production. An improvement in feather condition brings economic value to the owner. Listed below are various reasons of feather loss. Keep in mind that lack of food or water is the most frequent stress causing feather loss.

    •     Moulting - This is a physiological phenomenon, which consists of the shedding of feathers, followed by replacement with new feather growth. It is usually accompanied   by a reduction in egg production or even a complete halt.


    •    Feather-pecking - Feather loss can be caused by vices such as feather-pecking. Once established it is difficult to control and prevention is the best remedy. Social order pecking occurs primarily at the head and is not severe. Severe feather pecking due to overcrowding, lighting problems, unbalanced diets and boredom will injure your birds.


    •    Cannibalism - With feather-pecking any subsequent injury with drawing of blood will attract further pecking leading to cannibalism. To prevent cannibalism it is best to isolate the sick or victim bird from the flock or cage. The injured bird should have cuts treated with antiseptic powder and the wound should covered with Stockholm tar or " NO PICK " to reduce further pecking attacks. Once healed, the bird can be carefully reintroduced to the flock and monitored to ensure pecking is not repeated. 


    •    Abrasion - Feather loss is also caused by rubbing against other birds or surroundings, particularly if the birds are closely confined. To reduce feather loss, avoid overcrowding  and eliminate all sharp and rough surfaces. Alternative cage materials may also assist, as feathers wear away at different rates when rubbed against different types of cage materials.


    •    Mating - During mating the hen may lose feathers by the rooster treading the hen. The feathers are torn from the hen's back by the rooster's claws. To reduce this feather loss, the rooster's claws need to be trimmed with nail clippers. 


    •    Stress - A number of factors lead to stress, which can contribute to a reduction in egg production and the onset of a moult. Generally a lack of food or water is the most frequent stress causing feather loss. Poorly balanced diets or mouldy feed can also bring on moulting. Lack of cool, clean water, even for a short time, can cause birds to moult. 


    •    Other - Feather loss can also be caused by chilling, overheating and poor ventilation. A good housing environment will eliminate temperature extremes and still provide good ventilation for the birds. Ill-health either from injury, disease, parasites or bullying may also contribute to moulting. Regular monitoring of your birds will minimize stress and reduce further feather loss.

Wednesday, December 15, 2010

Plant those onions now

I have learned that it is best to follow directions so I researched the Farmers Almanac and it says  - December 2010, 13th-15th Plant Peppers, Sweet Corn, Tomatoes, And Other Above Ground Crops In Southern Florida, California, And Texas. Extra Good For Cucumbers, Peas, Cantaloupes, And Other Vine Crops. I happen to live in Texas so I planted mine. If you live in a mild-winter area like I do, you can plant seeds in fall through early winter and plant sets anytime in winter. If you live in a cold-weather area, you can start seeds indoors in winter and plant them out as soon as the soil is workable.
Onions like most veggies, like loose, rich, well drained soil. I plant mine in raised beds with layered mulch, soil, compost and straw. They like to be placed about 4-5 inches apart in a sunny location. Since onions are fairly shallow rooted you don’t need to water too deeply, but make sure they get watered frequently. Onions also like to be well feed, so if you aren’t planting them in a spot where you’ve planted green manure, you want to make sure you feed them regularly with an organic fertilizer or mulch them with grass. The bigger and stronger the plants, the bigger the bulbs.
You’ll know when it is time to harvest your onions when the tops have yellowed and have started to fall over. At that point, pull out your onions and leave them on the ground to dry for several days in the sun.  Once the tops have dried completely, pull them off the onion bulb, brush of the dirt and store them in a dark, cool, well ventilated area.

Wednesday, December 8, 2010

Your Goose is Cooked - Dinner that is

 
partially eaten goose
"As a child my dad always processed different types of birds for the holidays, we ate ducks, pheasants, quail and goose. Break the traditional routine and try a roast goose for Christmas dinner. I promise you, you won’t be disappointed. Goose, with its distinct flavor, has long been a European Christmas favorite for many years".


 Check your local Markets such as Whole Foods or search the web for pasture-raised geese in your area.

Roast Goose

1 fresh whole goose (10 – 13 lbs.)
Sea salt
1 thyme
1 rosemary
olive oil for basting
1 dinner fork (to poke holes in skin of goose)
1 onion (peeled, cut into large dice)
1 carrot (peeled, cut into thick slices)
1 rib celery (washed, cut into large slices)
1 bay leaf
1 orange (with the rind) cut into 6 sections
1 apple cut into 6 sections

Preheat oven to 350 degrees F. Tie the legs of the goose together with twine. Use the neck bone to make a quick goose stock, if needed for the stuffing recipe below. Next, using the fork, gently poke holes in the skin of the goose without going through the skin into the meat. Do this all over the bird (this will allow the fat to render off during the roasting process). Brush olive oil all over the bird. Rub the thyme, rosemary and sea salt over the olive baste. Stuff the cavity of the bird with the onion, celery, carrots, bay leaf, oranges and apples.  Transfer the goose to a roasting pan.  It's important to make sure your roasting pan is deep and strong enough to accommodate the goose. Do not use aluminum foil roasting pans because 3 cups of goose fat will render from the bird and, if spilled onto a hot surface, could ignite. Place the goose into the oven for 1 ½  hours to 2 hours or until done.  You may need to pour off the excess juice during the baking period. Remove from oven and let cool. Your goose is ready to eat.

Tip: Save the rendered fat from the roasting pan and use it in your gravy or stuffing.

Moms Wild Stuffing
 
1 box of your favorite brand of stuffing mix ( I use Stove top)
2 tsp. olive oil
2 eggs (well beaten)
1 large purple onion (peeled, diced)
2 stalks celery (diced)
1 large Bell Pepper (diced)
1 large apple (diced)
½ cup of raisens
½ cup of walnuts or pecans (your choice)
2 Tbsp. sage
1 Tbsp. parsley
1 Tbsp. chives
6 ounces chicken or goose stock (to desired consistency)
1 tablespoon butter
1 fresh sage leaf to garnish
Sea salt and white pepper to taste

In a large Bowl mix together the stuffing mix, with all the diced fruits and vegetables, nuts and raisens.  Now add the butter, olive oil, eggs, spices and stock and then mix well. Remember to pour the stock slowly until you have reached the desired consistency you seek.  Season with the salt and pepper. Scoop contents into a shallow baking dish and cover with foil. Bake at 350 degrees for 35-45 minutes or until crispy. You may need to remove the foil to brown the top (if desired).

Saturday, November 27, 2010

It's not cold until it's below freezing

Rhode Island Reds outside scratching for bugs
During cold freezing weather, egg production and hen comfort will be increased if they have plenty of (non-frozen) water to drink. If you don't have piped water to the hen house, I recommend using 10 qt. galvanized buckets as water'ers. Fill them with warm water and take them out to the hens. Take the frozen buckets from last time back indoors with you. Galvanized buckets are good because plastic buckets split when they freeze and poultry fountains are hard to open when they're partly frozen. Rubber buckets and pans are also good. You can place a tennis ball in the water'er and when the water freezes grab the ball and it will pull the ice sheet off with it.

 Chickens can handle very cold temperatures. Some experts say chickens don’t really start suffering until the temperature inside their coop falls to minus 20 degrees Fahrenheit. They’ll start suffering earlier if it’s damp inside the chicken house, or if they haven’t adapted to the cold, that's why its not a good idea to heat the hen house.  The hens will be warmer during the day if they exercise. They'll be warmer at night if they go to bed with a crop full of grain. The two can be combined by putting a thick layer of loose hay or straw in their pen and scattering a light feeding of grain in the morning and a heavy feeding of grain in the afternoon. Around the turn of the century it was common to have a "scratching shed" attached to the hen house, which was a substitute for range during the winter. The scratching shed was usually open-fronted (that is, walled on three sides only, with chicken wire on the fourth side), with a thick layer of loose straw on the floor. Grain is fed in the scratching shed, which is where the birds get their fresh air, exercise, and sunshine. Always make sure that the girls have a full crop of grain and other nourishment before roosting at night. Birds with existing health problems such as injuries or illnesses or younger less feathered birds may need to be put in different housing arrangements so that they will stay warmer.

Friday, November 26, 2010

Protecting Plants During Cold Weather

Winter weather is upon us and our beloved plants can wither away and die unless we take some precautionary steps. When the weather suddenly turns cold, early-flowering and tender plants may need special protection to avoid damage by freezing temperatures. There are several ways you can provide winter protection, including mulching, moving them into a warm shed or house, or by covering them up.

MULCHING: This is one of the best ways to protect plant roots. Bark, straw, sawdust, peat moss, leaves and even grass clippings are the most common mulching materials. Remove the weeds (if possible) before applying the mulch. As a rule the mulch should be about 2 inches in depth. However, there are exceptions that will be stated a little later in this information bulletin. Keep the mulch an inch or two away from the trunk or main stem of the trees and shrubs. Again, there are exceptions, such as roses and cane berries, where the mulch is actually mounded over the canes. Then when spring arrives, after all danger of frost has passed, these mulching materials are pulled away. Occasionally check through the mulching material, to be sure that moisture is getting to the soil below. This is especially important for plants that are situated under the eaves of the house or under tall evergreens where the soil is likely to dry out. It is important to note, that the combination of dry soil and cold temperatures can cause serious freeze damage to garden trees and shrubs. In fact, in some of the drier areas of the garden, such as under the eaves or under tall evergreens, you may need to water in mid-December or mid-January, if you find the soil dry.
 
COVERING: This is one of the most effective ways of protecting the foliage of broadleaf evergreen shrubs. Rhododendrons, camellias, azaleas and early flowering plants will often benefit from being covered with some type of cloth material during extremely cold weather. Start by placing three or four stakes around the plant being protected. Next drape some type of cloth material over the stakes, being careful that the cloth does not come in contact and freeze on the leaves. Notice I said cloth material, do not use clear polyethylene for this job, as it not only cuts off air to the plant, it also acts much like a greenhouse, taking plants from nightly lows to high daily temperature in a relatively short time period. This rapid temperature change can cause serious freeze damage or may be fatal to plants.
Any type of covering should only be left in place during the cold spell. As soon as the weather moderates or it begins to rain, remove the covering completely. However, leave the stakes in case it gets cold again.
Burlap, old moving blankets, sheets, Reemay or similar cloth or fabric materials are the best types to use as a cover over plants.

MOVING THEM: This is also another effective way of protecting the foliage of generally all plants that are potted. Move them into a garage, shed, patio or inside your home. Make sure that they receive light during the daylight hours.

Sunday, November 21, 2010

Minestrone

Minestrone made with Swiss Chard

Ingredients


  • 1/2 lb. dried large white beans, such as soldier beans, rinsed and picked over, soaked overnight in water to cover by several inches

  • 1/4 c. extra-virgin olive oil

  • 2 large red onions, peeled, halved, and sliced 1/4-inch thick (about 3 c.)

  • 4 medium carrots, cubed (about 2 c.)

  • 2 large celery ribs, sliced 1/2-inch thick (about 1 1/4 c.)

  • 1 lb. unpeeled new potatoes, cubed (about 2 c.)

  • 3 large garlic cloves, crushed

  • 2 qts. chicken broth

  • 1/2 tsp. freshly ground pepper

  • 1 lb. Swiss chard, cut into 1/2-inch shreds, stems and all

  • 1/2 lb. small macaroni, cooked (2 1/2 c., uncooked; 4 c., cooked)

  • grated Parmesan or Romano cheese

  • Directions

    Drain the soaked beans and place them in a pot with fresh cold water just to cover. Bring to a boil, then reduce the heat and simmer, partially covered, stirring occasionally, until tender. This could be as short a time as 30 minutes or as long as an hour. Taste along the way to catch them as soon as they become tender. In a 6- to 8-qt. pot, combine the olive oil and onions over medium-low heat. Let the onions cook, tossing occasionally, while you prepare the carrots, celery, and potatoes, in that order. Add each to the pot as it is ready and toss well to coat with oil.

    Stir the garlic into the vegetables; saute' until you can smell it, about a minute. Add the broth, and pepper. Bring to a boil and reduce the heat so that soup simmers gently, partially covered, for about 1 1/2 hours. Stir occasionally. Stir in the Swiss chard and the cooked beans. Increase the heat and bring to a rolling boil. Reduce heat again and simmer steadily, partially covered, another 10 minutes. Serve the soup over macaroni with grated cheese on the side. Makes about 5 quarts, serves 8 to 10.

    Advance preparation:
    Prepare as directed up to addition of Swiss chard and beans; the soup can be refrigerated for up to a week and frozen for up to six months. Bring to a brisk simmer before proceeding.

    Wednesday, November 17, 2010

    Its Trimming Time Again

    Pruning trees and shrubs not very more complicated if you follow a few guidelines. You can make cuts that will make your plants grow tall and also provide healthful benefits to them.

    The one-third rule is important to successful pruning. Prune less than one-third of a plant,  this includes grasses, shrubs and trees. The photosynthetic process that produces the plant's food occurs in the leaves. Removing more than one-third of them increases plant stress, making the plant more vulnerable to insect attacks or disease. On branches smaller than an inch in diameter, use sharp shears or loppers and cut about 1/4 inch above a node. Choose to cut at a node that will grow away from the center of the plant and into an area where it won't interfere with other branches. If you want to control future growth in a desired direction, prune above a node facing in that direction.

    When removing long or heavy branches, making three separate cuts prevents tearing the bark at the base of the branch. Make the first cut an undercut about a foot or more out on the branch and nearly halfway though the branch. Secondly, cut off the weighted end of the branch a few inches farther out and all the way through. Then, remove the remaining stub with the final cut. Be sure to cut just outside the branch collar, which is the swollen joint of the branch where it connects to the trunk. A proper cut outside the branch collar will heal into a symmetrical doughnut shape. The use of pruning paint is not advised.

    The four Ds listed below, if followed sequentially, will help ensure pruning success.

    - Dead. Remove dead or necrotic material. If it snaps when you bend it, remove it.

    - Diseased. Remove branches or leaves that show signs of disease or insect attack, but no more than one-third of the plant. Treat remaining problems in other ways.

    - Disfigured. Remove broken or unsightly branches. Remove branches that are rubbing against one another to prevent damage to their bark or plant cells near the surface.

    - Dysfunctional. Remove any branches that interfere with the plant's fruiting, flowering, appearance or general health. Remove suckers that appear at the base of the plant as vigorous upright growth, especially those below the graft line on fruit trees. Also remove water sprouts, which appear as strong vertical shoots from the plant's branches. Competing or multiple leads in young trees, as well as narrow crotches with small angles of attachment, should also be eliminated. Pruning to increase flowering and fruiting is very species specific. Do your research before pruning.

    Pruning larger trees, especially when it requires a chain saw and a ladder, is best done by a professional.

    Saturday, November 13, 2010

    Bald and Beautiful - Facts about moulting

    The seasonal decline in egg production occurs when birds go into a condition known as “moult”. Moulting is the process of shedding and renewing feathers. During the moult the reproductive physiology of the bird is allowed a complete rest from laying and the bird builds up its body reserves of nutrients. The provision of new feathers or coat is a natural process, designed by nature to maintain the birds' ability to escape enemies by flight and to provide greater protection against cold winter conditions. Normally, under natural conditions, moulting in adult birds will occur once a year, though it may occur in certain individuals twice in one year, and more rarely only once in a period of two years.

    PULLETS

    Pullets go through one complete and three partial moults during its growth to point of lay, after which the mature bird normally undergoes one complete moult a year, usually in autumn although this depends on the time of the year at which the bird commenced laying. Generally complete moulting occurs from 1-6 weeks and partial moulting at 7-9 weeks, 12-16 weeks and 20-22 weeks, and during this latter moult the stiff tail feathers are grown.

    HENS

    For hens moulting usually begins sometime during March-April and should be completed by July when egg production restarts. The three main factors which bring about moulting are:
    • physical exhaustion and fatigue
    • completion of the laying cycle. Birds only lay eggs for a certain period of time
    • reduction of day length, resulting in reduced feeding time, and consequent loss of bodyweight.
    Eleven months continuous production is expected from pullets hatched in season, so that if a flock of pullets commenced laying in March at six months of age, they should continue laying until the following February, although the odd bird may moult after laying for a few weeks. These few birds however should begin laying again after June 22  and continue in production until the following autumn.

    Pullets coming into lay in June should lay until the following April thereby giving eleven months continuous egg production without the aid of artificial light. Pullets coming into lay in spring (August) should lay well into April (9 months) but unless artificial lighting is provided, most of them will moult during May and June.

    NUTRITION

    Cessation of laying and moulting indicate that the birds' physical condition is deteriorating, and is therefore unable to support egg production, continued nourishment of their feathers and body maintenance. Feathers contain protein and are more easily grown when laying ceases, because of the birds difficulty in assimilating sufficient protein for both egg and feather production. During the moult the fowl still requires a considerable amount of good quality food to replace feathers and build up condition. 

    Sunday, November 7, 2010

    Wow my hen stopped laying

     I hear it all the time, my hen stopped laying. But armed with some information about a hens laying cycle this isn't such a mystery anymore. A pullet begins laying eggs at 18 to 20 weeks of age. She reaches peak production at about 35 weeks.  Peak egg production lasts about 10 weeks and after that her egg production slowly begins to decline.
    A top egg laying hen’s annual egg production is more than 10 times her body weight. The average commercial battery hen lays about 265 eggs per year, with backyard breeds laying fewer. In most cases, the more exotic the breed, the poorer the egg production.

    All hens will stop laying eggs for a variety of reasons. Different things affect hormone levels, which change the condition of the ovary and oviduct, the organs responsible for egg production. The result of these changes is the cessation of egg production. The most common event that affects egg production is decreasing day length.
    Hens are sensitive to day length, and particularly to the direction in which day length is changing, when it comes to laying eggs. Declining day lengths discourage egg production. It is not unusual for a flock owner to have hens go out of production in the latter part of summer and in the fall because the days are getting shorter. Commercial egg producers avoid this problem and maintain egg production year round by using artificial lighting to give hens a long day length no matter what the season. You can do the same thing if the flock roosts inside a building by keeping lights on long enough to simulate an appropriately long day length. A good rule of thumb is that the total length of light per day, both artificial and natural, should be no shorter than the longest natural day length the hens will experience. Therefore, the amount of artificial light needed will be minimal in summer and greatest in winter.


    Other things that effect egg laying are disease, broodiness, poor nutrition, and stress. But even under the best circumstances all good things must come to an end.

    Thursday, November 4, 2010

    Keeping Your Hens Warm in the Winter

    Chickens don't mind the cold but they do mind draughts and the rain at night so these are a top winter priority for them. The chicken coop, or house, should be tight enough to keep the cold wind from blowing through the walls. I recommend that all four walls made of wood. Ventilation should be above head height and there should be no draughts coming through the coop. The waterproofing needs to be checked and any areas that are dripping water into the housing need to be sealed quickly. Wood should be used for roosts and should never be made of metal poles or plastic.

    Wood roosts will help to keep your hens feet warm whereas metal or plastic will stay cold all the time and cause their feet to become too cold. Imagine stepping on a sheet of tin with your bare feet in the winter and then having to remain there for hours. Some sort of litter such as straw should be used inside the coop and around the coop. This will help by keeping the hens feet off the frozen ground while they scratch around during the day. The entrance to the coop will become muddy and frozen if no bedding is put down. This can make the hens reluctant to come out during the day. Keeping the straw clean is extremely important. Check it daily, rake out and replace when it becomes soiled or wet.

    Tuesday, November 2, 2010

    Merlin Falcon - cruisin for a chick

    Every morning without fail my little buddies are out there flying overhead, looking at the chickens that are now biggern' they are, The Merlin Falcon, Falco columbarius has a 24 to 27 inch wingspan and a 12 to 13 inch body. 

    My free rangers are alot bigger now so the Merlies fly overhead and contemplate but realize the match is over for them. They still get very close actually landing on the ground near the pullets but my dog Cody chases them off. They return soon and browse the deli aisles of my homestead still hoping to find a weak link. A month ago they did nab a few when they were smaller. I was upset but realized that they have to eat too. I keep my small chickens penned up now until they are big enough and smart enough to stay out of the talons of the falcon. Merlins are actually cute birds. The males upperparts are slaty blue, purplish, or dark umber-brown streaked with black from the crown to shoulders and back. The tail is barred by dark umber-brown or blackish bands and is tipped in white. Underparts are cream to a rich buff with heavy longitudinally streaks of dark umber-brown or black coloration, except for the throat which is an unmarked white. The sides of the head are bluff with fine darker streakings. The forehead and line above the eye is white. The beak is bluish horn; the cere and feet are chromo yellow; the claws are black; and the iris is deep brown. The females are similiar to males in markings, the distinction from the male sex lays within the coloration. Her upperparts are dark brown, the neck is streaked with lighter brown and the tail is banded in yellow bars with a white tip. The merlin preys mainly on small birds of the ground and low vegetation such as small chickens, larks, swallows, and finches. They also eat small mammals such as small rabbits, rats, mice, and lizards, snakes, insects, and dragonflies. The relative proportions of the food are about 80% birds, 5% mammals and 15% insects. Merlin’s usually breed in areas that contain marshes, oaks, cedar and mesquite and enjoy open areas since it is easier to spot prey. 

    Merlin falcons have genealogy that traces back as far as five million years ago and today still have a broad population leading them to rank at the bottom of the endangered list with the status of ‘least concern.’  They are considered to have the most in common with the red-necked falcon due to their similar hunting habits but do not share much in common when it comes to overall appearance.


    Sunday, October 31, 2010

    USDA Webinar on poultry biosecurity

    US - As part of Biosecurity for Birds' Bird Health Awareness Week on 1 to 7 November, the US Department of Agriculture's Animal and Plant Health Inspection Service (APHIS) is sponsoring a free webinar called, 'The Word on Healthy Birds'.

    USDA
    The webinar will take place on 5 November and be hosted by USDA's poultry veterinarian, Martin Smeltzer and Andy Schneider, an Atlanta radio personality known as the 'Chicken Whisperer'.

    Mr Smeltzer said: "The webinar will cover valuable information on raising healthy backyard poultry. Topics will include how to keep your flock safe from predators and disease, the biggest threats to keeping your birds healthy and signs and symptoms of infectious diseases."

    More than 200 people have already signed up to participate in 'The Word on Healthy Birds' webinar. If you are interested in participating, please go to Word On Birds Webinar for information on how to sign up [click here]. Space is limited.

    Since 2004, APHIS has been conducting an extensive outreach and education program/campaign called 'Biosecurity for Birds', which reaches out to backyard poultry and pet-bird owners to provide tips and advice on how to recognize signs of disease and to prevent diseases from reaching their birds. APHIS' efforts are in recognition of the importance of preventing infectious poultry diseases, such as high pathogenic avian influenza and exotic Newcastle disease, from being introduced into the country. To report a bird exhibiting disease-like symptoms, please call 866-536-7593.

    For more information on the 'Biosecurity for Birds' campaign, click here.

    Beneficial to both experienced and new bird handlers, this webinar will equip you with the latest and greatest information on how to keep your birds healthy and keep infectious diseases from being introduced into the country.

    Monday, October 25, 2010

    Roasted Free Range Guinea Fowl

    Before you start roasting your guineas let me first mention a little guinea hen 101. Guinea fowl are an important food throughout Africa and are found in nearly every region of the world. France, Belgium and Italy are amongst the largest producers of guinea fowl. The guinea fowl is native to West Africa and is known to have been a part of the diet of the ancient Egyptians. It appears in Roman mosaics but did not become widely eaten in Europe until the Portuguese began importing the birds from Guinea in the sixteenth century. Guinea fowl then spread quickly across western and northern Europe and have been reared for the table in this country for ages. I currently do not sell any frozen ready to bake guinea hens, but I can recommend a great place that does. Good Shepherd Ranch currently sells, goose, turkeys and guineas ready to buy for an original feast. Treat your family and friends to a one of a kind Thanksgiving meal.


     Roasted Free Ranged Guinea Fowl

    •  2 Free Ranged Guinea Fowl
    • 4 cloves garlic, chopped
    • 3 sage leaves
    • 1 sprig rosemary
    • Salt and freshly ground black pepper to taste
    • 3 T olive oil
    • 6 slices of bacon
    1.   Pre-heat the oven to 350°f.
    2. COMBINE 2 slices of bacon, garlic, sage, and the leaves of the rosemary and chop until the mixture is very fine. Add a little salt and pepper and combine with 1 T of the oil. Rub the outside of each bird with this mixture and lay in a roasting pan that will just hold them. Drape 2 bacon slices over the top of each breast and sprinkle with a little more salt and pepper.
    3. Roast for 1 and a half hours and baste with more olive oil as needed. If the juices run clear when the meat is pierced with a fork, the bird is done.
    4. Delicious served with Braised lentils.
    Braised Lentils
     
    1 small bag of lentils
    2 sticks of celery finely chopped
    1 small onion finely chopped
    1 small bell pepper
    2 carrots finely chopped
    2 cloves of garlic finely chopped
    olive oil
    1 Bay Leaf
    1tsp of sea salt
    dash of pepper

    1. Fry the onions, celery, carrots, bell pepper, and garlic in olive oil
    2. Add the lentils, bay leaf, salt, pepper, and enough water to cover
    3. Simmer for 30 minute until softened
    4. Serve with a sprinkling of fresh parsley
    Guinea Fowl Trivia: The name of the common species of guinea fowl, meleagris, comes from a story in Greek mythology. Meleager, prince of Macedon, was killed by his mother after murdering his uncles. Meleager's sisters, weeping in grief, are turned into guinea-hens and their tears form the pearl-shaped markings found on the bird's feathers.

    Quick Pumpkin Iced Brownies

    Well its time I break out an exciting dessert for you all to try... This recipe is guaranteed to make you happy. If you have kids buy a bag of pumpkin candies to top off each brownie. This will make pumpkin haters into pumpkin lovers.


    Brownies

    • 1 box of your favorite Brownies Mix
    • 1/4 cup canned pumpkin
    • 1 small bag of chopped walnuts or pecans
    • 2 eggs


        1.    Heat oven to 350°F (325°F for dark or nonstick pan). Grease bottom only of 9-inch square pan with shortening or cooking spray.
        2.    Make brownie batter as directed on box, using 1/4 cup canned pumpkin, nuts and the 2 eggs. Spread batter in pan.
        3.    Bake 40 to 45 minutes or until toothpick inserted 1 inch from side of pan comes out almost clean. Cool completely. Frost and then cut into 4 rows by 4 rows. Store covered in refrigerator.

    Icing


    • 1 package (8-ounce) cream cheese, softened
    • 1/4 cup canned pumpkin
    • 1/4 cup (1/2 stick) margarine
    • 1/2 teaspoon pure vanilla extract
    • 4 cups confectioners' sugar, sifted
    1. Blend the cream cheese, pumpkin, margarine, and vanilla in a large bowl using an electric mixer set at medium speed until smooth. Add the powdered sugar and continue to beat until light and creamy -- about 5 more minutes.

    Saturday, October 23, 2010

    Welsummers - Layers of dark brown eggs


    Named after the village of Welsum, this Dutch breed has in its make-up such breeds as the Partridge Cochin, Partridge Wyandotte and Partridge Leghorn and still later the Barnevelder and the Rhode Island Red.


    In 1928, stock was imported into this country from Holland, in particular for its large brown egg, which remains its special feature, some products being mottled with brown spots. Welsummers have  distinctive markings and color, and falls into the light breed category, although it has good body-size.


    It enters the medium class in the country of its origin. Judges and breeders work to a Standard that values indications of productiveness, so that laying merits can be combined with beauty.  Its main characteristic is the large dark brown egg, described by many as "a rich deep terra red brown, almost glowing.


    Monday, October 18, 2010

    Blue Laced Red Wyandottes

    Now this hen loves her rooster


    I am really happy with my great Blue Laced Red Wyandottes. This variety of Wyandotte is relatively new and came to the United States from England a short time ago. I was able to get my stock from an outstanding breeder in Oklahoma, Mr. Bill Braden. Mr. Braden told me that he had purchased his first birds from a lady in Axe, OK who had obtained her birds from the McKinney-Govero Line.  Mr. Braden then purchased a rooster from Mr. Gregg Catt of Colorado, and crossed the females he had obtained from Axe, OK. to produce the Bill Braden Line of Blue Laced Red Wyandottes. I feel fortunate to perpetuate the Braden Blue Laced Red Wyandotte gene pool. 


    This rooster is 99.9% perfect - hes molting in this pic
     It is said that the original development of these beautiful birds came from crossing Silver Laced and Golden Laced varieties of Wyandotte's. After much work the Blue Laced Red was developed from this cross. The blue gene will color the chicks either light blue or dark blue in the lacing (the area around the reddish colored feathers) in both the baby chicks and the mature birds. 


    I have 3 different ranges of blue

    Therefore you may have birds that vary somewhat in appearance but still display the beautiful colors of this very rare and unusual chick. Mature Blue Laced Red Wyandotte's lay brown eggs and are medium in size with the deep - round -Wyandotte appearance. There are three different Blue Laced Red Wyandotte colors, Blue, Splash and Black Blue. Below is the breeding chart to follow when breeding the different blues.

    Sorry I'm molting, get back with me in the spring and I will rock your world.

     If you mate: 

    Blue  X Blue = 50% Blue . 25% Black , 25% Splash

    Blue  X Splash  = 50% Blue , 50% Splash 

    Blue X Black = 50% Blue, 50% Black

    Splash X Black = 100% Blue  

    Black X Black  = 100% Black 

    Splash X Splash = 100% Splash

    What a BLR Wyandotte should look like......

    ROOSTER

    MALE COMB, FACE, WATTLES AND EAR-LOBES: Bright Red. 
    BEAK: Horn shading to yellow at point. 
    EYES: Reddish bay. 
    HEAD: Plumage, rich mahogany bay, each feather having a medium blue stripe tapering to a fine point near it extremity. 
    NECK: Hackle—web of feathers lustrous medium blue with a narrow lacing of rich mahogany bay, uniform in width, extending around the point, shaft mahogany bay. Front of neck—same as breast. 
    BACK: Rich mahogany bay on surface. Saddle—rich mahogany bay in appearance, with a medium blue stripe through each feather, laced with rich mahogany bay, conforming to shape of center, the medium blue stripe having a long diamond-shaped center of rich mahogany bay. 
    TAIL: Main Tail—Medium blue. Sickles and Coverts—Lustrous, medium blue. Smaller Coverts—Medium blue with diamond-shaped centers of rich mahogany bay laced with rich mahogany bay. 
    WINGS: Fronts—Medium blue with rich mahogany bay centers. Bows—Rich mahogany bay. Coverts—web of each feather rich mahogany bay, with narrow, sharply defined lacing of lustrous, medium blue, forming a double bar of laced feathers across wings. Primaries—Medium blue with lower edges rich mahogany bay. Secondary—Medium blue lower half of lower webs, rich mahogany bay with narrow medium blue edging wider at the tip; upper webs edged with rich mahogany bay. 
    BREAST: Web of each feather, rich mahogany bay, with a narrow sharply defined lacing of lustrous, medium blue .
    BODY AND FLUFF: Body—web of each feather, rich mahogany bay, with a narrow sharply defined lacing of lustrous, medium blue. Fluff—medium slate. 
    LEGS AND TOES: Lower Thighs—web of each feather, rich mahogany bay, with a narrow, sharply defined lacing of lustrous, medium blue conforming to edge of feather Shanks and Toes—yellow. 
    UNDER COLOR OF ALL SECTIONS: Medium slate, shading to mahogany bay at base.
    I am almost done molting, and when I am, I'm drop dead gorgeous.
     

    HEN

    COMB, FACE, WATTLES AND EAR-LOBES: Bright Red. 
    BEAK: Horn shading to yellow at point. 
    EYES: Reddish bay. HEAD: Plumage, rich mahogany bay. 
    NECK: Rich mahogany bay in appearance, each feather medium blue with a narrow lacing of rich mahogany bay. Shaft, mahogany bay. Front of Neck—same as breast. 
    BACK: Web of each feather, rich mahogany bay, with a narrow, sharply defined lacing of lustrous, medium blue. 
    TAIL: Main Tail—Medium blue. Coverts and Lesser Coverts—rich mahogany bay, laced with medium blue. 
    WINGS: Fronts, Bows and Coverts—web of each feather rich mahogany bay with a narrow, sharply defined lacing of lustrous medium blue. Primaries—Medium blue with lower edges rich mahogany bay. Secondary—Medium blue lower half of lower webs, rich mahogany bay with narrow medium blue edging wider at the tips; upper webs edged with rich mahogany bay. 
    BREAST: Web of each feather, rich mahogany bay, with a narrow, sharply defined lacing of lustrous, medium blue. 
    BODY AND FLUFF: Body—web of each feather, rich mahogany bay, with a narrow, sharply defined lacing of lustrous, medium blue. Fluff—medium slate. 
    LEGS AND TOES: Lower Thighs—web of each feather, rich mahogany bay, with a narrow, sharply defined lacing of lustrous, medium blue to conform to edge of feather Shanks and Toes—yellow. 
    UNDER COLOR OF ALL SECTIONS: Medium slate.
    Hello there
     

    Wednesday, October 13, 2010

    Soothing Texas chicken and rice soup

    The weather is changing fast and before we know it, its winter. With that being said cold and flu season is creeping up slowly.  When fighting a flu or just the cold weather, nothing warms you up faster than a bowl of chicken soup. This healthy version filled with vegetables, garlic and jasmine rice is guaranteed to hit the spot and soothe what ails you.

    Texas Chicken and Rice Soup
    • 1 tablespoon extra-virgin olive oil
    • 1 medium red onion, chopped
    • 1 large diced tomato, or subs. small can of diced whole tomatoes 
    • 3 fresh large garlic cloves, minced
    • 3 medium carrots, cut diagonally into 1/2-inch-thick slices
    • 3 corn cobs, cut into 3rds (can substitute w small can of whole corn)
    • 6 fresh thyme sprigs
    • 2 bay leafs
    • 2 whole dried Serrano chili's
    • 2 quarts chicken stock or broth
    • 1 cup of water
    • 1 cup jasmine rice, can subs. with any rice
    • 1 whole boiled chicken, that has been cut up into small pieces
    • sea salt, to taste
    • ground black pepper, to taste
    • add more water as needed
    Boil the chicken and save stock for soup. Place a soup pot over medium heat and add the olive oil. Add the onion, garlic, carrots, thyme, chili's, and bay leaf. Cook and stir for about 6 minutes, until the vegetables are softened but not browned. Pour in the chicken broth and water- bring the liquid to a boil.  Add in the corn, tomatoes and chicken; season with salt and pepper. Cook on medium-low for a half hour than add rice and cook again until the rice is tender-about 30 minutes.  Serve hot.
    *serve with hot flour tortillas and honey iced green tea

    Saturday, October 9, 2010

    Fall Garden Update - Peas in a Pod

       My fall garden is coming along just great. I have to chase a few marauding hens out every now and then. Don't get me wrong hens and gardens go together like "Peas in a Pod." Except when there are seedlings and then I have to watch them like they are hawks. The girls are lucky that I watch out for them..and the hawks too. It is hawk migration season here in Texas  and hawks have been hanging around all of a sudden in droves, its scary for the young pullets. They can get snatched off the ground in a split second, which I witnessed the other day. Fall hawk migration dates are August 15th through November 15th.

    As I said they are quite persistent little gals. I have one hen in particular who is kind of a pest, because she flies over the fence every morning. She could wipe out all my fruits of labor in a few short minutes. I discovered that she targets my garden to go lay her daily golden egg in the compost bin. Well I have moved the compost bin outside next to the side of the house. She will have easier access to it now. You could say that chickens are easy to outsmart. Unless she figures out where the peas are at. And a hen eating my pea sprouts will definitely get me started.

    Friday, October 8, 2010

    October Pumpkin Bread and a Latte

     I was dreaming of savory hot pumpkin bread today while I was working on the chicken coops and this recipe popped into my head. I have perfected this over the years so that it is tasty and good for you at the same time. I harvested some pumpkins earlier this year and froze some of the pulp for this occasion.

    My other treat is my great do it yourself pumpkin spice latte recipe. No need to go to Starbucks. Let me know how your bread turned out I would like to hear from you.


    October Pumpkin Bread

    3½ cups whole wheat flour
    2 teaspoons baking soda
    1½ teaspoons salt
     2 teaspoons cinnamon
     1 teaspoon ground nutmeg
     1 teaspoon cloves
     2 cups sugar
     1 cup of honey
     1 cup canola oil (substitute with 1 cup of applesauce to make it even healthier)
     4 *eggs (I use fresh brown eggs or duck eggs)
     2 cups canned pumpkin or fresh *pumpkin that has been boiled, and mashed
    1/2 cup walnuts
    1/2 cup *raisens


    Preheat oven to 180 °, Sift dry ingredients together, Mix pumpkin, water, oil and eggs together in another bowl. Pour into dry mixture and mix well. Pour into 2 greased 9x5x3-inch loaf pans. Bake 1 hour and 15 minutes or until toothpick inserted in middle of loaf comes out clean. Cool before removing from pans

    Your Own Pumpkin Spice Latte

    1 shot of expresso; or use strong brewed coffee
    1 cup of milk
    3 Tbsp sugar-free Torani Pumpkin Spice Syrup
    2 tsp vanilla extract
    cinnamon-sugar (optional)

    Brew the espresso as usual, or brew strong coffee. Froth milk in 2 mugs. Warm frothed milk in microwave if desired. Pour 1 1/2 Tbsp of syrup into each mug. Add vanilla if desired. Pour espresso or coffee into each mug through the foam. Sprinkle tops with cinnamon sugar if desired.

    Thursday, October 7, 2010

    Home dried Serrano Chilis

    Today I harvested all my Serrano chili's and took them in the house so that I could dry them in the oven for future use. I washed the peppers with warm water and dried them thoroughly with a dish towel. Next I removed the stems. Be sure to discard peppers if they have:
        •    Soft, mushy, or spoiled areas
        •    White, grayish, or diseased-looking spots
        •    Have a questionable or rotten odor
    Also remember before you start drying peppers to take the following precautions:
    If you're drying peppers indoors, keep the area well-ventilated. Warmed peppers will give off strong fumes that are irritating to the eyes. Make sure to open your windows and bring in a portable fan or two to keep the air circulating and minimize the watery eyes and burned nasal passages. Take extra precaution around young children, pets, or anyone who is sensitive to spicy foods.


    Drying in the Oven

    You can dry peppers in any regular kitchen oven. Simply place the peppers on a cookie sheet in a single layer and place it in the oven. Set the oven to its lowest temperature setting, which is usually labeled as "WARM", or just below 150 degrees Fahrenheit. Every hour, rotate and/or flip the peppers over for even drying. As soon as they're fully dry, remove from the oven and place in an air-tight container. Larger, thicker-skinned peppers will take longer to dry than smaller or thin-skinned chili's. Once chili's are totally dry and cooled off they may be placed in a plastic storage container or a zip lock baggie. I like them ground up and saved for chili spices. There are some excellent Serrano Chili recipes at this blog.
     

    Sunday, October 3, 2010

    Build Your Own Clothesline

    What's a great way to reduce your energy usage, and at the same time enjoy some fresh air? Don't let me forget to mention that you will save over $150 annually on your electric bill? Why its building your own clothes line. Really, there is really nothing better than clothes that have been dried naturally in the outdoors… the sweet smell of the breeze and the sun. It’s amazing how the sun naturally bleaches stains out. Building an outdoor clothes line is inexpensive and will only take you a couple of hours…For approximately $30 at your local Lowes or Home Depot… you can get everything you need to build your own outdoor clothes line.

    Material List:


    (2) treated 4 X 4 Posts – 8ft
.
    (1) treated 2 x 4 – 8ft
.
    (10) Wood screws

    (8) #6 Eye Bolts

    Clothes line (nylon or plastic), 100ft
.
    (2) 80 lb. Bags of Quikrete
    Paint (this is optional)

    Tools:

    Drill / Cordless Scewdriver

    Saw (hand or circular)

    Measuring tape

    Level

    Shovel or post hole digger

    1. Dig 2, 24in deep holes about 10 – 12 feet apart.

    2. Cut 4 x 4’s down to 7 feet (less if you want your clothes line lower).

    3. Cut 2 x 4 in half.

    4. Attach 2 x 4 across the top of the 4 x 4 posts with wood screws.
    5. Pre-drill holes for eye bolts across 2 x 4 and screw in 4 bolts per side.

    6. Mix quikcrete following directions on the bag.

    7. Using a level place posts in ground and make plumb, and then fill the hole with  the quikrete.

    8. Tamp down around base of posts.
    9. Hang line across and tie with 2 – 3 half-hitch knots per. Make lines about 95% taught.
    10. You can choose to paint if you like.

    That’s it. For $30 and a couple of hours in the back yard you can build your outdoor clothes line dryer, reduce your household energy consumption, save over $150 annually and get fresh smelling clothes.

    Tips & Tricks

    Don’t like the stiff feeling of your clothes after being line dried? Try doubling up your towels when you hang them out. Washcloths can be dried in sets of three. Slower drying fabric equals softer fabric.

    Green Ideas

    Going green can be easy after all! Browse through this list of simple solutions designed to save energy and reduce carbon emissions for the planet, and at the same time save you money.  I have listed these suggestions that I use from day to day.
    * Hang laundry out to dry on a clothesline - they are fairly easy to make
    * Do not accept plastic bags - instead buy your own grocery bag and bring it with you to the store
    * Compost food waste for your garden
    * Choose recycled purchases when possible
    * Recycle paper, cardboard, metal, plastic
    * Convert to all CFLs 
    * Turn off lights when not in use
    * Turn off water while rinsing/brushing 
    * Use high-efficiency washing machine
    * Dishwasher - full loads, water saver, turn off dry cycle
    * Turn refrigerator temp up to 43F
    * Buy many items used
    * Recycle, Freecycle, consign, donate instead of trash
    * Use cloth handkerchiefs
    * Use cloth napkins
    * Print on both sides of paper and re-use paper before recycling
    * Unplug appliances
    * Bring own water bottle & coffee cups
    * Grow our own vegetables and fruit
    * Drive gently to get better mileage
    * Reduce hair dryer use
    * Use low-flow toilets
    * Flush less
    * EnergyStar appliances
    * Low-flow shower & faucet aerators
    * Get books/movies at library instead of buying
    * Wash your clothes in cold water
    * Cook with a crock pot
    * Use public transportation whenever possible
    * Use a laptop instead of a desktop

    Saturday, October 2, 2010

    Ruth's Split pea Soup

    This is a great all time favorite recipe that I just made the other day. My teenager even liked it so thats saying alot.

    1 pound of sausage (your choice) browned and drained
    6 Cups of water
    1 bag (21/2 cups) dry split peas
    2 medium potatoes, diced
    3 large carrots, shredded
    1 onion chopped
    1/2 tsp marjoram
    1/2 tsp. pepper

    Wash dried peas, and soak the night before. The next day combine all ingredients in your crock pot and cook on low setting for 4 to 6 hours or until done. Serve with hot french bread.

    Tuesday, September 28, 2010

    If we only had the sense of geese

    This fall when you see geese heading south for the winter... flying along in V formation...you might consider what science has discovered as to why they fly that way. 

As each bird flaps its wings, it creates an uplift for the bird immediately following. By flying in V formation the whole flock adds at least 71% greater flying range, than if each bird flew on its own.

 People who share a common direction and sense of community can get where they are going more quickly and easily because they are traveling on the thrust of one another.

 When a goose falls out of formation, it suddenly feels the drag and resistance of trying to go it alone... and quickly gets back into formation to take advantage of the lifting power of the bird in front. If we have as much sense as a goose, we will stay in formation with those who are headed the same way we are.

When the head goose gets tired it rotates back in the wing and another goose flies point. It is sensible to take turns doing demanding jobs...with people or with geese flying south.

 Geese honk from behind to encourage those up front to keep up their speed. What do we say when we honk from behind?

 Finally...and this is important...when a goose gets sick or is wounded by gunshots, and falls out of formation, two other geese fall out with that goose and follow it down to lend help and protection. They stay with the fallen goose until it is able to fly or until it dies, and only then do they launch out on their own, or with another formation to catch up with their group.

 If we have the sense of a goose, we will stand by each other like that.

    Author Unknown

    Wednesday, September 22, 2010

    Fall gardening time

    I was really pleased with my spring garden, and thanks to that success I am doing one for the fall. Besides my son will love me for all the yummy sandwich veggies and so will the hens. The chickens always get the trimmings, weeds and the final-cleanup.  Final clean-up involves letting them in to eat what's left after we the plants are finished with their yield. Right now the hens are locked out of the garden area. They would love nothing better than to sneak in and eat all the freshly planted seeds. There always is that occasional hen that does sneak in looking for tasty bugs and things she's not supposed to eat. When I do catch her she is ousted faster than she can say cluck, cluck, CLUCK.

    I am pleased to say that one of the benefits of living in Texas is the extra-long growing season. The Lone Star State actually has two growing seasons, spring and fall. The extreme heat of summer permits most gardeners to take a break during the hottest months and plant their second vegetable garden in September. So fellow Texans and others living in similar climates make sure and take advantage of the warm weather and learn how to grow a fall vegetable garden.

    I always plant in raised bed gardens. Raised bed gardens are the saviors of gardeners with poor soil everywhere. I don't know about you but my soil is as hard as a rock and loaded with clay. The basic idea of a raised bed is that instead of battling against poor soil conditions, you build above ground, where you have absolute control over the soil texture and ingredients.  After I build the frame out of four even lengths of untreated boards nailed together I carefully place layers of newspaper, mulch, compost, hay, and soil like I am making lasagna. The final layer is nice fine soil in which to plant my seeds. The drainage is also excellent in raised beds.

    Next it's time to choose what vegetables you wish to grow. Consult a local planting guide, such as the Old Farmers Almanac, and look for the cooperative extension services link or google the internet with specific keywords such as planting a vegetable garden in the fall or the month you are planting.

    Next I supplement the existing soil with compost, soil and other goodies that I have been aging such as coffee grounds, compost and chicken poop. Some soils can be quite poor and supplementing with organic soil from the local gardening center will help overcome deficiencies. Prepare the seedbed so that the top surface is raked free of clods, stones and debris. Next plant your carefully selected fall vegetable seeds such as peas, beets, radishes, chard, collards, cauliflower and brocolli. Keep soil moist with frequent watering during germination by using a fine spray nozzle to moisten the soil until water begins to run off. Sprinkle at least daily unless it happens to rain. I also use plenty of organic mulch to keep weeds down, conserve moisture and reduce soil temperature. My choice is hay that I purchase from my neighbor who bales his own. Good luck with your fall garden it is well worth the work.

    Saturday, September 18, 2010

    Its raining cats and dogs, oh! and chickens......

    Yesterday we had quite a downpour and it came out of nowhere. One minute I was outside putting fresh straw in the young pullets barn and bingo.... rain. Luckily I had just finished so it was actually perfect timing because these younger chicks needed the straw to keep them warm and dry. As the rain came pounding down I fled to the house and when I got inside it dawned on me there were chickens way out in the field free-ranging and where would they go to stay dry? Under a tree? A tree wouldn't suffice in this heavy downpour. I glanced out a window and to my surprise they went right out in the rain and were getting wet on their own free will, and seemed to enjoy it. I still was not satisfied that they were o.k and did some more investigating. I put on my raincoat and walked outside to the pens where the other chickens were and they were also out in the rain. They had dry houses in which to seek shelter in and chose to be water logged. Well I thought to myself that proves that!. they just like the rain. The  hens were actually digging in the mud for worms. The rain brings all the dirt bugs to the surface. I can't say I blame them because in a chickens world worms are steak. I finally went inside with a peace knowing they were doing what chickens do.

    Wednesday, September 15, 2010

    The Scream of the Banshee


    Buck Wheat, Buck Wheat, Chi, Chi, Chi......the sound of the guinea, you either love them or hate them. I personally could not imagine living without them. These polka-dotted little munchkins run around sporting a face that only a mother could love? Guineas are a great addition to your homestead and are rightfully named the farm yard watch dog, sounding the alarm whenever anything unusual occurs. They will consume large amounts of insects and rarely bother your garden except to cruise through and pick out the bugs.  They are also fairly easy and inexpensive to raise.  Once started, they fend for themselves, living on insects, seeds, and grasses. They control ticks, grasshoppers, spiders, crickets, scorpions, frogs and almost all other insects. They always will alert you to anything unusual.
    Here in Texas they are very popular for control of ticks. They also will discourage rodents with their call and will kill and eat mice and small rats.  Here in the country snakes are very common and the Guineas will spot and find snakes and alert me so that I can kill them before they cause any harm. The Guineas themselves will kill snakes also. Other people keep Guineas because they enjoy having them around.  They are very curious and interesting birds, having quite a personality.  Others enjoy having the various colors, especially the new colors that are being developed. 
    The incubation period for Guinea eggs is 26 to 28 days.  The eggs may be incubated under broody hens or any reliable incubator.  Follow the instructions.  If nothing is listed for Guineas, follow the instructions for Pheasants or Turkeys.
    Start the keets (young guineas) on a good Turkey starter feed (28% to 30% protein).  The high protein makes them grow fast and keeps nutritional deficiency's at bay.  Keep the brooder at 95 degrees the first week.  Reduce 5 degrees per week.  Keep them warm and dry and you won't have any problems with them.  Be sure to keep them safe from other birds and to prevent drafts in the brooder area.  The first water given keets on arrival should be warm to prevent chilling. Make sure they can't get in the water or they will get wet and chill or drown.  Use marbles or rocks to fill the water area so as to make a shallow drinking area.  Also place the feed and water close to the heat source for the first day.
    Guineas attacking a frog